Server Side
The posts of the first 5 weeks of this blog were about client side web technologies including JavaScript, HTML, CSS and XML. Now the blog will shift towards server-side development and technologies which perform tasks by the server in the client-server model.
The basic way to describe this model is, the client will send a request to the server using the appropriate protocol (for example using the HTTP protocol on port 80 for Web Requests while using a web browser) which will then respond either with the requested item or an error. There are many server types apart from Web Servers which make use of this model. These include:
- File Servers
- Application Servers
- Instant Messaging
- Images and Sound (such as live streaming and online radio)
The 2 leading Web servers being used in today’s industry are Apache and Microsoft IIS (Internet Information Services). Now these servers usually make use of Database servers or other types of servers to add more functionality and to set up all servers needed could cause a lot of problems but fortunately there are some packages, which are open source, which group all the servers so that it will be much easier for the user to install and set up. An example of such package is XAMPP, a cross platform package (meaning it could be used on different operating systems such as Windows, Linux, MAX OS X etc…), which consists of Apache HTTP (The Web Server), MYSQL Database server, FileZilla FTP server, PHP and OpenSSL.
Task Summary
The task assigned relates to the installation and setting up of XAMPP. Here is an outline of the given tasks
- Install XAMPP
- Test the following function with XAMPP:
- Control Panel
- Check that the http and https services work
- Check the ftp service
- Get an XAMPP security Report
- Get a php info report
- Get a visitor report
- Test the guestbook
- Add an image and a style sheet to "..\xampp\htdocs\index.html" and test it out
- attempt to replace index.html and other files using an FTP client from another computer
Downloading and Installing XAMPP
XAMPP for Windows can be easily downloaded for free from Apache Friends. The latest version available at the time of writing and thus used for this task was 1.7.4. Once downloaded the installation wizard starts, which asks the user which services he would like to install. All the services were ticked and the installation was started. After the installation is finished, all services can be controlled from the XAMPP control panel.
Common problems with Apache Web Server
There are a couple of common problems that one could face after installing Apache:
- Sometimes before the installation starts a message box pops up which states that due to UAC (User Account Control) some functions of XAMPP may be restricted. This is due lack of permissions the user has in the C:\Program Files. To Change the UAC settings in a Windows 7 machine go to the Control Panel à System and Security à Action Center and under Security there is the option User Account Control, click on Choose you UAC level and slide to the option “Never Notify”. The machine usually needs a restart to implement these changes.
- Another common problem with Apache is that something may already be using port 80(HTTP) and 443(HTTPS) on the server, to solve these issues one could set the Apache server to use different ports for HTTP and HTTPS.
Testing the Functions of XAMPP
Control Panel
The image below shows the XAMPP control panel running on a Windows 7 machine. The Control panel shows you all the available services installed with an option to stop them at any time. Also information such as the Directory and version of the XAMPP along with any problems there are, are found in the large text field under the services. The Status button will show you all the services currently running along with the Port that they use. The explore button will take you to the folder where the XAMPP is installed (usually c:\xampp).


Check the HTTP and HTTPS services
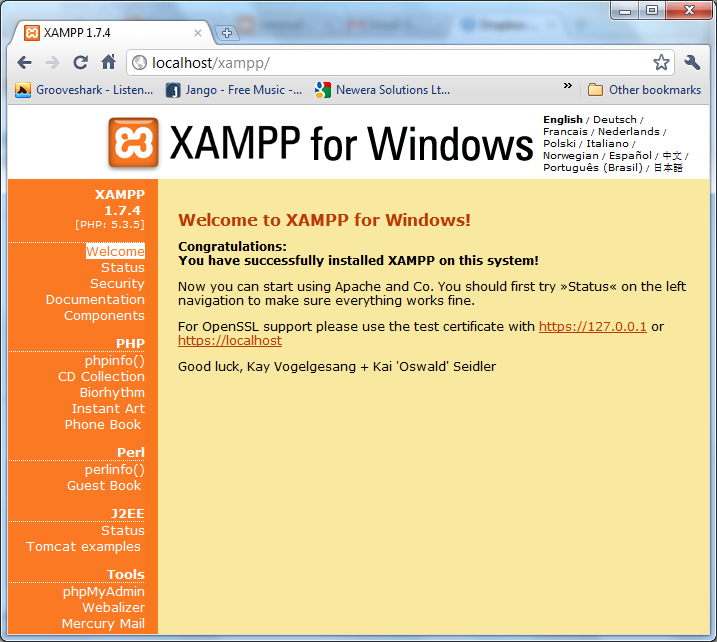
To test these 2 services is very simple. In the Control Panel the Admin button next to the Apache module takes us to the main page of the web server which in the case is a splash screen. (Alternatively one could enter http://localhost in a web-browser). This page is a welcome page which allows the user to select the language for the XAMPP. Also by opening this page one has successfully tested if the HTTP module is working properly.
To check for the HTTPS service first I checked that the service is activated in the Status page of XAMPP, then to verify one must browse the main page using https instead of http. The result of browsing the main page with the URL https://localhost/ is a security message since the certificate is not trusted.


Check the FTP service
Again we go to the status page and make sure that the FTP service is enabled. To test this service we must make use of it by sending or downloading files from the server by using FileZilla FTP Server which is part of XAMPP and is already installed. By entering ftp://127.0.0.1 in the Windows Explorer the FTP server was accessed and logged into using one of the 2 default users Filezilla has when installed. After logging you could see all the files and folders which where given permission to that particular user.


Getting an XAMPP security Report
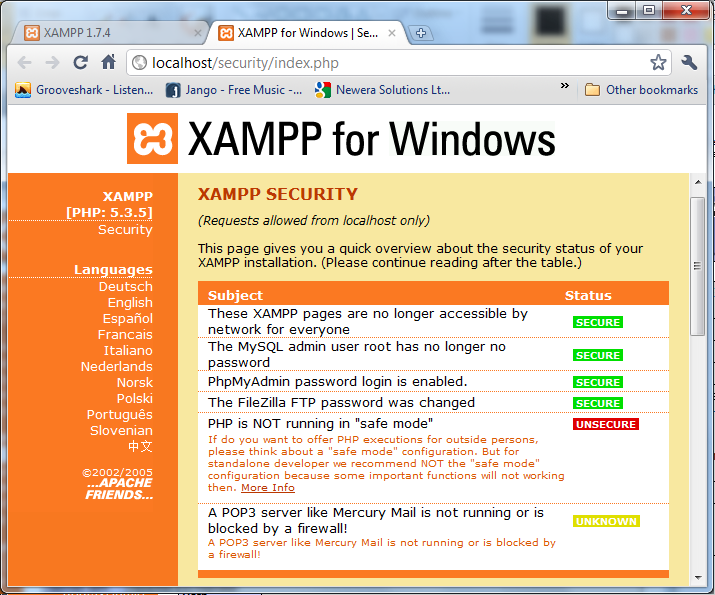
The report itself is very easy to get from the security page. At first most items are unsecured since XAMPP is defaulted to be as open as possible. To fix most of the security issues XAMPP provides with a security console which helps the user change some passwords to make some of the services more secure.
The remaining 2 items where fixed manually, The FTP password was changed from the FileZilla Server Interface and according to the Security report itself, if PHP is going to be used for development purposes its best to leave it running not in safe mode, so this security issue was left as it is.


PHP phpinfo() report
The XAMPP homepage provides the phpinfo() report which displays information regarding the PHP installation, configuration and operating environment of the server. Details include PHP version number, installed modules, predefined variables and server environment information.


Get A Visitor Report
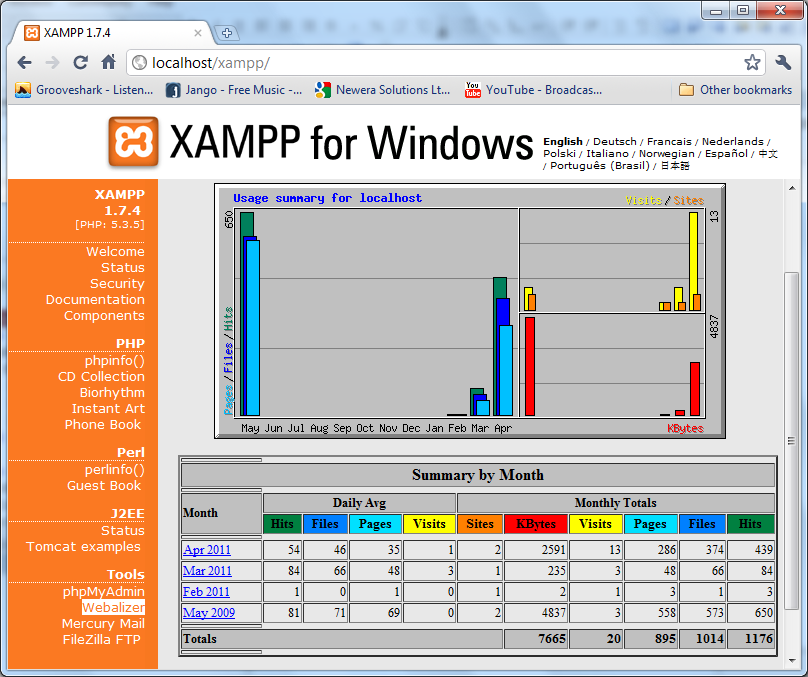
XAMPP also provides us with a tool called the Webalizer. This tool shows the number of Visits on the server at a given month in the form of a graph.


Test the guestbook
Changing the layout and adding an image to Index.html
After Finishing with all the features of XAMPP I went to the htdocs directory to change the HTML file of the index and then access it from another machine to notice the changes, the file was easily found and very simple changes in the document using HTML and CSS where used. To view the file online from another machine I ran the ipconfig command in the command prompt of the Server to find out the exact IP. Then using a web browser in the other machine I typed in the IP followed by “/index.html”, and the changes could be viewed.
Attempt to replace index.html and other files using an FTP client from another computer
The last task required to set up the FTP server so that it could be access from another computer in the network. First through the FileZilla Server, I created a new account “Guest” with a password and the files which it can read and/or write. This user will be used to access the Server from another PC. To access the Server I typed in ftp://192.168.1.83 in the windows explorer of the other machine, but before the computer asked for a username and password to gain access and error popped up stating that no connection was being established. This was identified as being simply the Windows firewall blocking FTP connections to the machine.


